App Design Process

Nail design app with augmented reality and salon browsing features.

01.

Overview

Context

This was a 8-week project focused on creating, evaluating , and prototyping interface designs. We primarily ideated our sketches on Figma, and experimented with Adobe XD, Axure, and Adobe AfterEffects to create a working prototype with augmented reality functionality.

Our team is comprised of 4 members: Chris Wong, Nancy Chen, Samyak Sah, Praneet Atwal .

02.

CHALLENGE

Problem

Though some initial research, we found that some businesses are finding it harder to promote their products as users are opting to do more shopping online. These businesses tend to be in the area where customers historically can only go in store to buy the products that would fit the customers’ size, which are retailers in the jewelry, nails, or clothing industry.

Specifically focusing on the nails enthusiasts demographic, many felt that drop-in appointment wait time can be too long, with no clear catalogue of options, or an overwhelming amount of customization choices.

03.

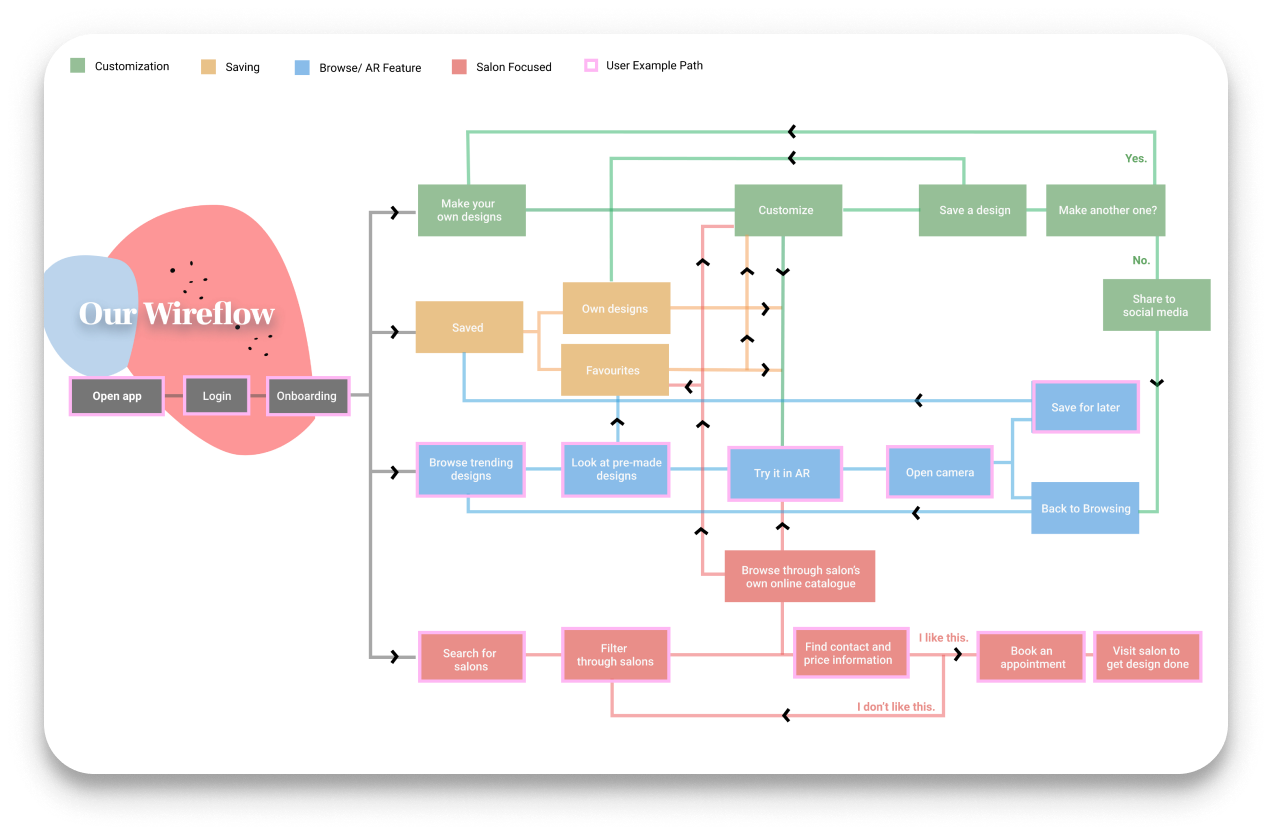
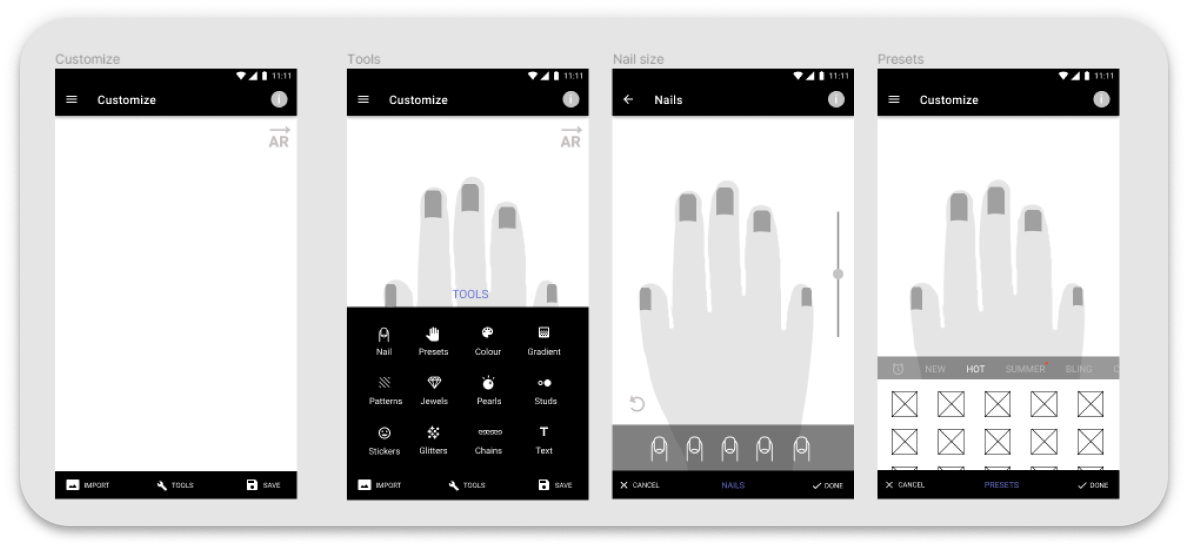
Reframing and Opportunity

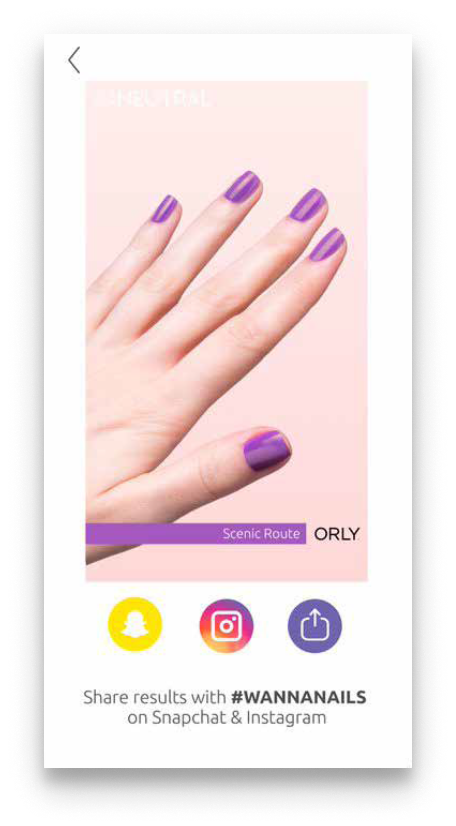
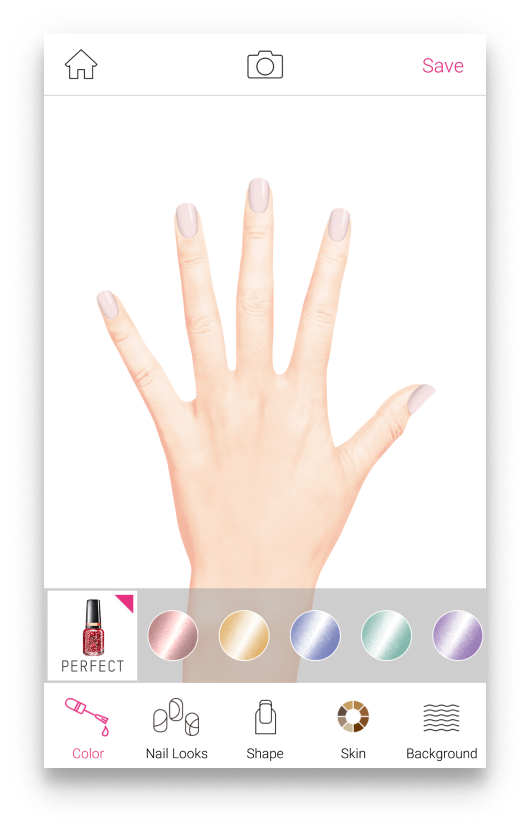
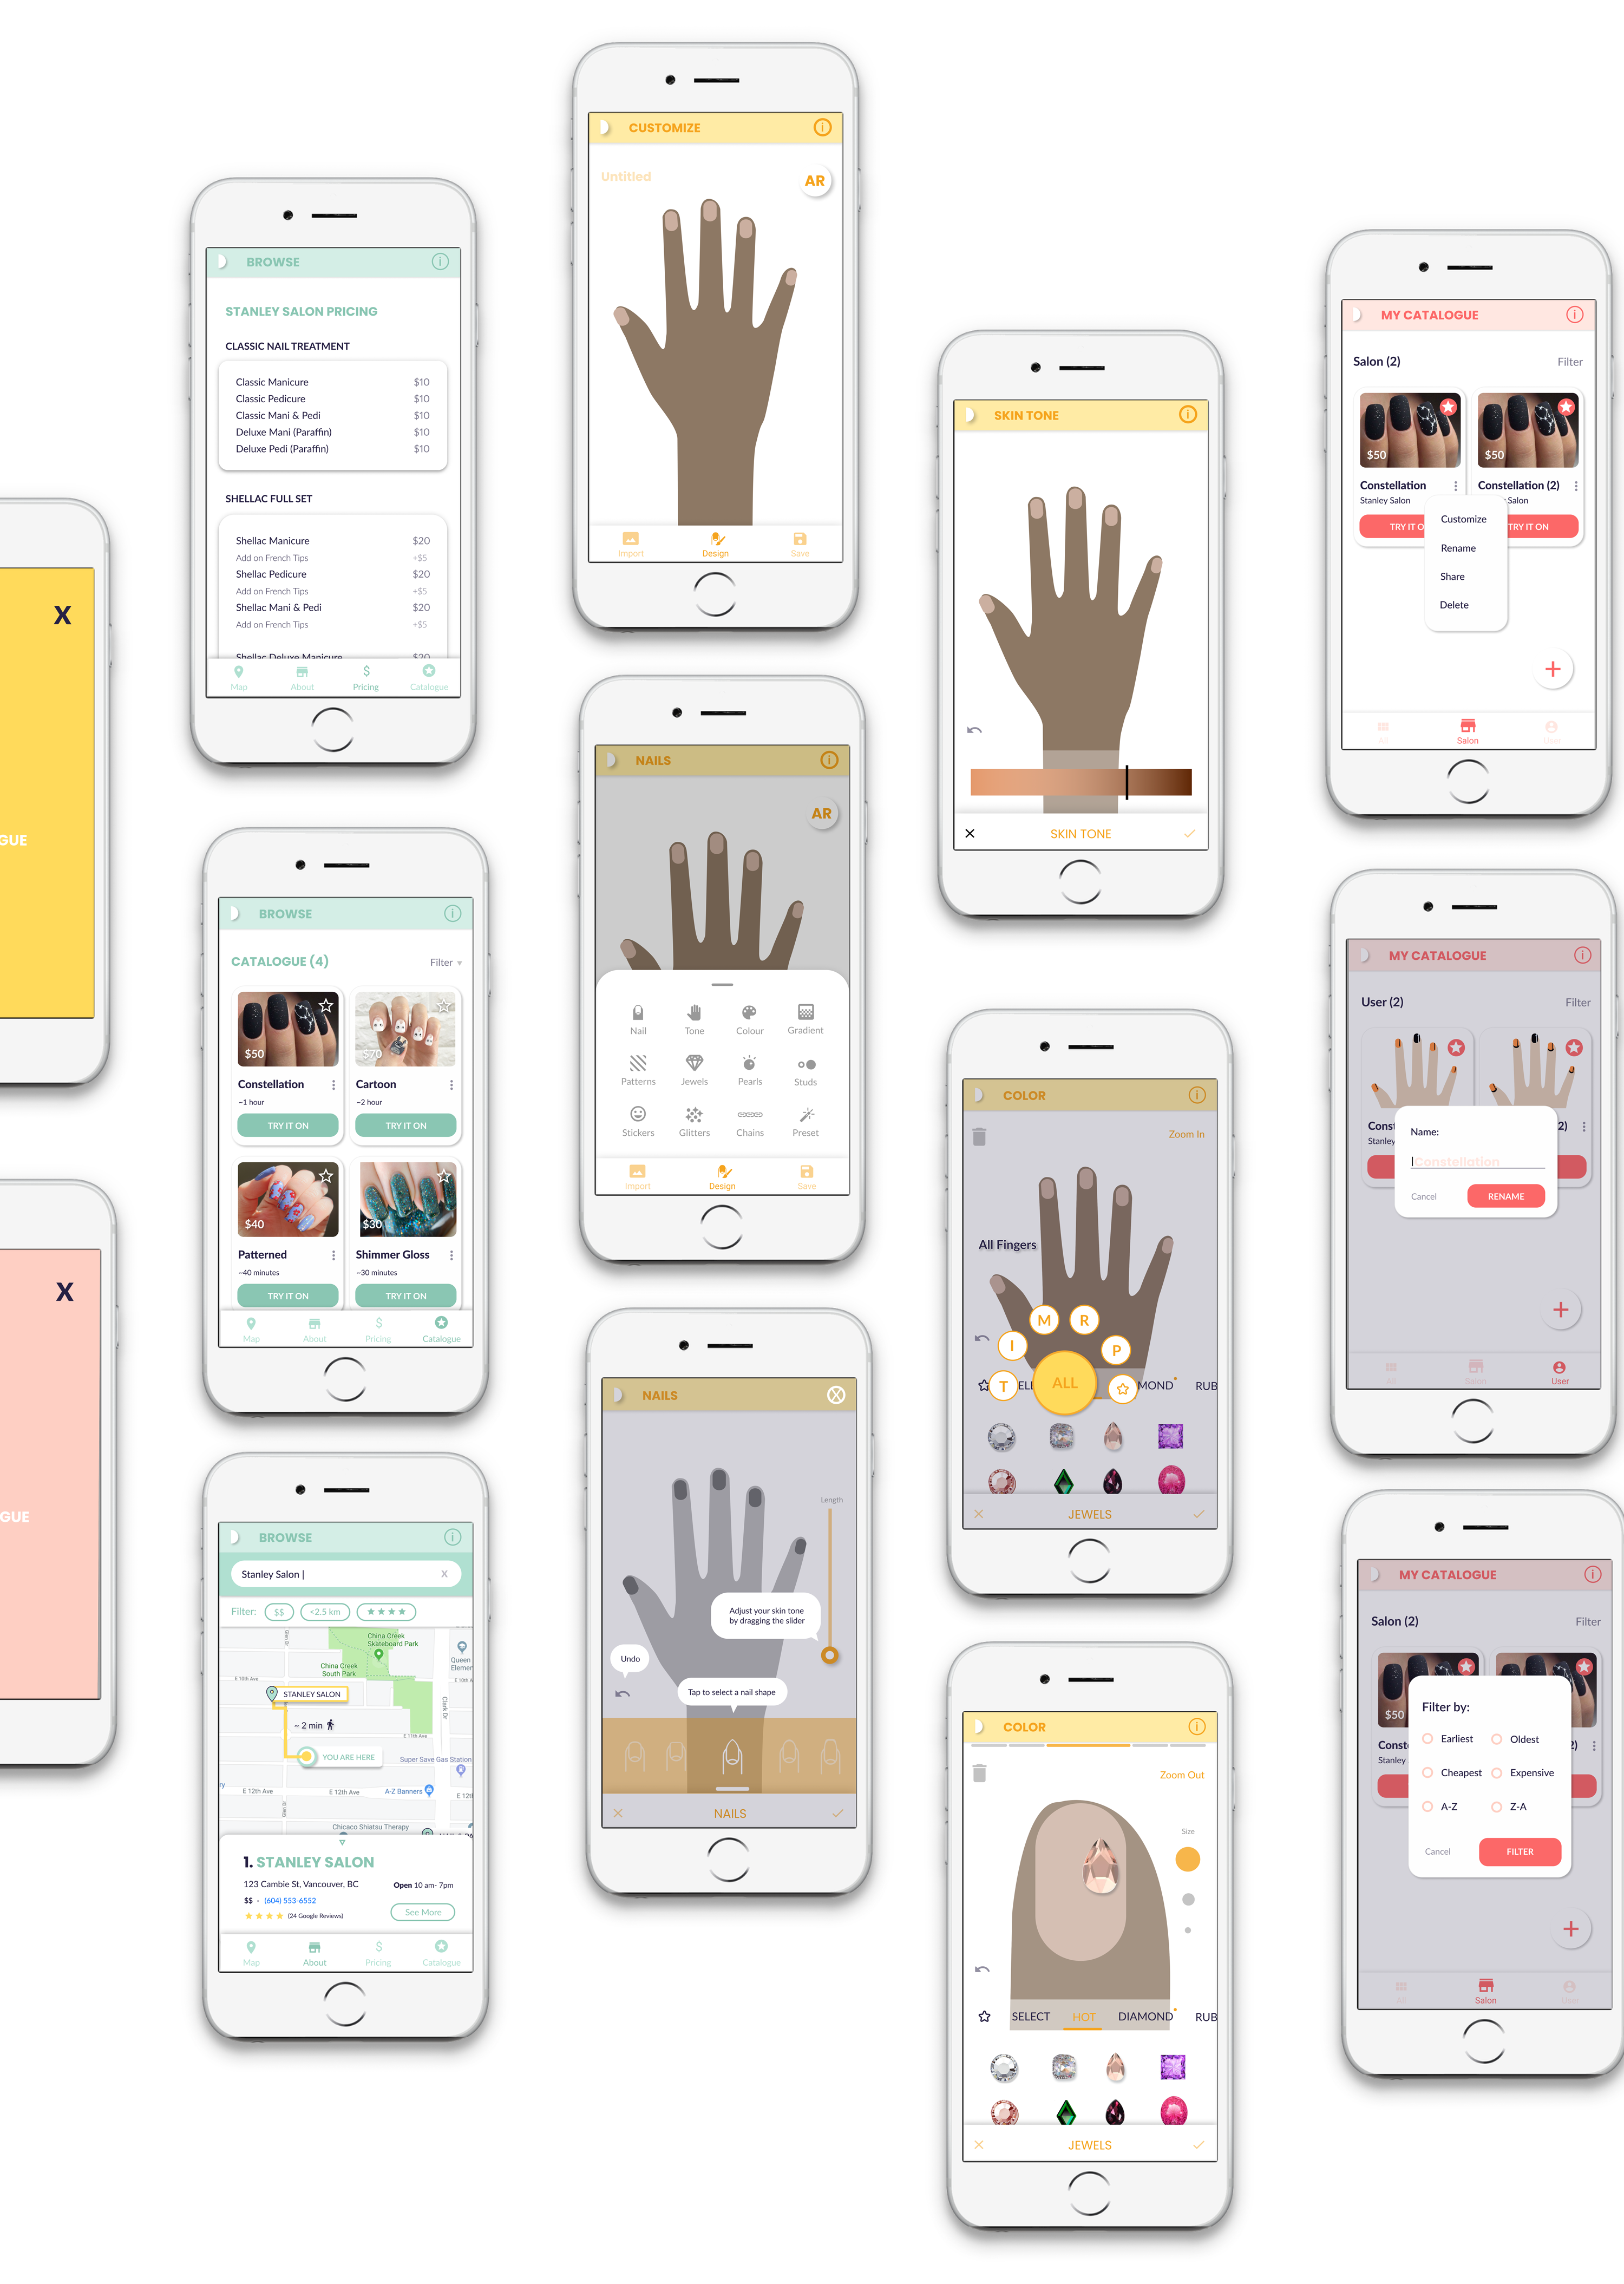
Inspired by recent development in the AR industry, we felt that by incorporating augmented reality into the nail designing process (by projecting customized designs onto the user’s nails captured by their phone camera screen) could help nail enthusiasts make a more informed choice before an expensive appointment with salons.

With the inclusion of AR technology, it could potentially be a quick prototyping tool that can allow users to try out different designs or colour that could match their skin tone or unique style.

04.

Ideation

We decided to focus on nails customization integrated with augmented reality that allows users to create their own nail design and test it out in real time using their phone camera.The app allows user to save their designs and a browsing feature promotes salons closest to the user, making it easier for users to find and choose the salon they want to go to.

Some existing application we looked at includes Wanna Nail and YouCamNail. Both application that uses similar AR tech, but are limited to imposing image changes onto a static image.

WannaNails
YouCamNails

05.

Audience

Our main target audience are individuals who are interested in getting their nails done between the age of 17 - 40 who are comfortable using technology. They would like to easily prototype nail designs with lots of accessory options and can browse different designs based on season, mood, trends, and events. In addition, their wants also includes the ability to search nearby salons that offers good and cheap service. The ability to share, save, and find inspiration for their design would be a bonus for the tech-savvy audience.

06.

Stakeholders

Our main stakeholder would be local nail salons, who want to engage and meet the expectation of their customers to develop a stable clientele.

07.

Sketching & Wireflow

After conducting a few interviews with our target audience, we identified frictions our participants have encountered during and after their nail appointments. The data allowed us to identify areas where our app could enhance user experience, which can be seen in our persona’s journey map.

Our 4 main features that users can interact with includes a customization feature, saved designs, designs exploration made by different users, and searching for nail salons in the area. Onboarding tutorial in the beginning also introduces each feature to the user so they won’t feel overwhelmed.

From there we compiled features that the user wanted, and sorted the priority of each. Features that are on the high valued and low effort bottom right, were what we wanted to design for the application which decreases as it’s placement on the chart became higher due to more effort.

Wireflow of Activity

Feature Prioirity Chart

Initial Grey Box Mockup

08.

Prototyping.

With various tools

We then started on a grey box wireframe which went through several internal testing and revising.

Figma Interactive Prototype

While creating prototypes for the app, one major challenge we faced was finding the right prototyping tool that could support the animation we wanted for our app’s customization tools to do.

We initially used Figma’s animation which supported simple transition, but could not fully translate the customization tool’s ability during some user testing.

Our data from tests became skewed due to technical issues. Upon switching to Axure, we quickly had to remake our wireframe interactions robust enough that we can get some more reliable data results from our target audience of nail enthusiasts. We conducted 4 user testing and were able to find some user experience and efficiency issues.

09.

Reiterating

Reframing Once Again

From the user testing feedback, we found that many of our buttons were a bit small for users with long nails to interact with. Thus, some button sizes were made larger. Naming of the “Tools” was also changed to “Design”, as users weren’t accustomed to the former term. Since Axure doesn’t have dragging and dropping, we weren’t able to fully build our customization prototype or the hold to select feature that can be seen on Pinterest.


With a lot of stuff that need fixing, we were a bit closer to our final prototype. It is at this point that we made some adjustments of the layout, grid, and solidified our style guide and app name.


A major change that we realized was needed after the prototype testings was the large scale of our app. Cutting a feature may be necessary, so we came to the conclusion that the exploration of designs made by other users may not be our highest priority.


Many nail lovers already follow artists they enjoy on social media to keep up with the trend, or keep Pinterest board that have all their inspirations. With nearly all of our participants saying that they are comfortable searching for their design through Google or social media, we decided the exploration feature wouldn’t be eliminating any frictions that are in need of solving.

10.

Final Implementation

A new design of the app layout was made with a more cohesive style and tighter interaction flow. For some of the mobile views interaction, they were animated in Figma, while the more complex interaction animation were created in Adobe AfterEffects to achieve our ideal vision of how the customization and AR integration would work.